Bricks
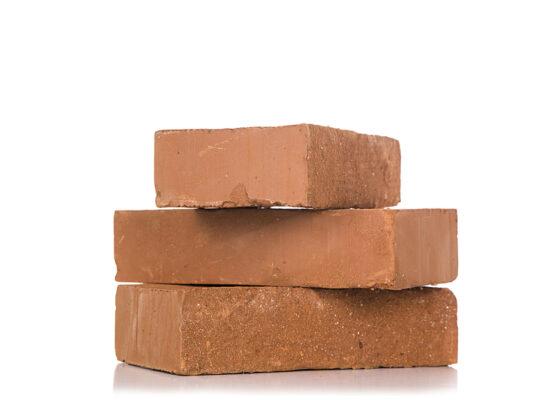
Bricks are little rectangular building pieces that are commonly used to build walls. Before 7,000 BC, when the first bricks were made from hand-molded mud and dried in the sun, bricks were first used for construction. Mass-produced bricks replaced stone, which might be more expensive, less predictable, and more difficult to handle, as a common building material throughout the Industrial Revolution.
Even today, bricks are frequently used to build paving, walls, and more intricate structures like columns, arches, fireplaces, and chimneys. They continue to be used frequently because they can be built up into complicated shapes, can be visually appealing, can be built up into relatively small and manageable sizes, and can be extremely strong in compression.
For some building types, particularly larger buildings, bricks can be seen as time-consuming, expensive (although this is disputed by the Brick Development Association), structurally limiting, and requiring too much on-site labor. However, more recently, other materials have been developed that can be used as alternatives for building walls or for cladding facades. The invention of reinforcement techniques and the creation of pre-fabricated brick panels have helped to resolve some of these issues.
The dimensions of bricks
Standard bricks in the UK measure 215 mm long, 102.5 mm wide, and 65 mm high.
This results in the ratio 3:2:1:
– A repeating unit of bricks put in a stretcher bond will be 225 mm long and 75 mm tall with a typical mortar joint of 10 mm.
– If bricks are put crosswise, two mortar joints and two 102.5 mm widths offer the same repeating unit as one brick’s length, or 120 mm.
– If they are laid height-wise, three 65 mm heights plus three mortar joints result in a repeating unit that is 120 mm long, which is the same as the length of one brick.
What materials are used to make bricks?
Clay is the most common material used to make bricks, however concrete and calcium-silicate are also frequently used.
By pressing the brick mixture into molds and then burning them in a kiln, soft mud or dry-press bricks are created. While dry-press bricks are manufactured from a thicker mix that provides finer definition, soft-mud bricks are made from a thinner mix. The brick can be made stronger by pressing it down harder and firing it for longer, although doing so raises the cost.
By forcing the brick mixture through a die to create an extrusion, which is then wire cut to produce bricks of the desired length, extruded bricks are created.
To use less material, bricks can either be solid or have holes punched through them. As an alternative, they could feature what is known as a “frog” on one or both of their surfaces. When laying bricks, the frog must be filled with mortar; otherwise, the wall’s structural and acoustic performance will be compromised. In order to make it simple to fill, it is recommended practice to arrange bricks with the frog facing upward. The largest of two frogs should be facing upward when there are two of them.
What kind of bricks are considered special?
In addition to the common rectangular block, there are a variety of unique shapes for different situations that could arise when using bricks. These include: Bricks that are radial, tapered, or arched.
- Angle and cant bricks that create chamfers and returns.
- Bricks with bullnose edges and rounded corners.
- Bricks for coping and capping.
- Bricks for cill.
- Bricks for a plinth.
- Brick slippers (thin bricks that can be used for cladding).
- Bricks for soldiers, in the form of refunds for soldier courses.
- Bricks can also be sized to fit a space.
Engineering bricks are exceptionally strong, absorb little water, and resist acids well. Typically, they are employed in civil engineering applications.
What bonding patterns are used when laying bricks?
Bricks can be laid as soldiers, stretchers, or headers, standing straight up against the wall (laid width wise along the wall).
An interlocking mortar joint holds bricks together as they are laid. Depending on exposure or to provide a certain visual effect, the mortar joint’s (pointing) profile might be changed. The most popular profiles are recessed, weather struck, bucket handle, weather struck and cut, flush (rag joint), and weather struck and cut.
The brick alignment is described by the bonding pattern. There are numerous common bonding patterns, including:
- Bond for stretchers. The UK’s most popular bond is this one. In relation to the course above and below, each stretcher (brick laid lengthwise) is offset by half a brick.
- Bond in English. Stretchers and “headers” (bricks laid width-wise) are laid in alternate courses, with the alternate courses aligned to one another.
- A shared bond in America. With one course of headers for every six stretcher courses, it is comparable to the English bond.
- Cross bond in English. Stretcher and header courses alternate, but with the stretcher courses being offset by one-half brick.
- Bond in Flemish. Stretchers and headers should be switched off throughout each course.
- The header bond. header courses that are half a brick apart.
- Bond in a stack. joint-aligned bricks that are stacked exactly on top of one another. Fundamentally, this link is weak, therefore reinforcing is probably necessary.
- Bond on the garden wall. followed by one course of headers and three courses of stretchers.
- Bond for Sussex. One header and three stretchers per course.
Bricklaying Techniques
Bricks can be used to build walls, foundations, columns, and other types of constructions. Bricks can be set in a variety of ways, including soldiers (standing straight up), stretchers (placed lengthwise along the wall), and headers (laid width wise along the wall).
Calculating the requisite number of bricks is crucial before beginning the bricklaying process. Standard bricks in the UK measure 215 mm long, 102.5 mm wide, and 65 mm high. A repeating unit of bricks put in a stretcher bond will be 225 mm long and 75 mm tall with a typical mortar joint of 10 mm.
Usually, a string, level, and tape measure are used to plot the shape of a basic construction. Bricks may need to be set on top of a footing that has been poured and allowed to cure if there isn’t already a slab there.
A string line should be strung between the bricks at the structure’s two ends to serve as a guide for placing the first courses of bricks. In order to guarantee that the bricks are set level, guideposts, which are wooden boards with markings pushed into the ground at either end, are also advised.
Typically, a mortar bed is placed on top of the footing along the string line. The mortar is then molded into a V with the help of a trowel, making it easier for the bricks to be tapped into place. At one end, place the first brick and give it a little tap to help it “bed in.” Before being positioned to abut the first brick, the following brick should be “buttered up” by having mortar smeared onto either end. The excess mortar that has been squeezed out from underneath or between the bricks should be removed with a trowel.
To avoid forming a weak line, bricks should always be put with staggered vertical joints. It could be necessary to chop some bricks in half to obtain staggered vertical joints. The brick should be marked where the cut is to be made, and after being set down on firm ground, a sharp blow should be performed with a bolster chisel and lump hammer. Then, rough edges can be chiseled away.
When using bricks with frogs rather than holes, the frog should face upwards during installation to guarantee that the frog is entirely filled with mortar. To learn more, go to: Which way should a brick be laid?
After the first course of bricks has been laid, use a spirit level to verify the level along the top and, if necessary, tap each brick to make small changes. To prevent lining joints up with the course below if a full brick were to be used, the second course should be started with a half-brick on both ends. Place a full brick next to the half-brick at each end, then proceed with the second course as before.
The wall needs to be built up at both ends a course higher than the one being worked on in order to stay level. It will appear stepped at each end as a result. From the ends in, the bottom courses are filled in, with each end being built up one course higher, and so on. To prevent the joints from lining up, it’s crucial to remember to alternate half-bricks with complete bricks at the end of each row.
Sometimes brick pillars can be inserted halfway or at the end of a wall. Typically, this is a pillar-like “mini-wall” that projects from the main wall. At the end of the wall where the pillars will begin, a brick should be set side on. The string line should be raised as each additional course is set, and the pillars should always be constructed at least one course higher. After each course is finished, the level should be checked.
To provide a clean and tidy finish, it is crucial to fill in any gaps before striking (pointing) them with mortar. The excess mortar can then be removed off the brickwork by brushing it with a delicate hand brush.


© Arbemu. All rights reserved